Transfer between wallet accounts.
In this section we will build a component for transferring tokens between accounts using the Polkadot.js extension to sign. This new component will be added to the generic card.
Exercises
This exercise will consist of completing the code in the Transfer functional component provided in the cloned example repository.
4. Create Transfer component.
1. Import library components
The next step will be to build a new component called Transfer and it can be used in the genericcard or in some other component of your own projects.
To add functionality to the Transfer component we will need to import 2 components from the polkadot-js API, these are:
WsProvider: component is used to establish a WebSocket connection with a Polkadot network node.
ApiPromise: component is used to interact with the blockchain node through the WebSocket connection established with WsProvider.
Additionally, this component will need to use 3 components from the '@polkadot/extension-dapp' library, these are:
web3Accounts: This component is used to fetch a list of accounts available in the Polkadot.js browser extension. It allows accessing user accounts and their details, such as the account address and name.
web3Enable: This function returns a promise that resolves to an enabled Polkadot.js provider object if the user grants the necessary permissions.
**web3FromSource:**This function is used to obtain a signed account object from a specific source, such as an account in the Polkadot.js browser extension.
We will import the following:
import { ApiPromise, WsProvider} from '@polkadot/api';
import { web3Accounts,web3Enable, web3FromSource } from '@polkadot/extension-dapp';
2. Create states in React.
The second step will consist of adding the necessary states. The code will look like:
    // Create a state for the amount to be transferred
    const [valueAmount, setValueAmount] = useState('');

    // Create a state for the address
    const [valueAddress, setValueAddress] = useState('');

   // Create a state for the status transaction
    const [status, setStatus] = useState('');

     // Create a state for the blockhash
    const [blockhash, setBlockhash] = useState('');
3. Create an instance.
We create an instance called wsProvider, this is a necessary element to obtain the connection with the node.
  // Create an instance of the Polkadot network provider
  const wsProvider = new WsProvider(wsEndpoint);
4. Add Transfer function.
Finally we need to add the transfer function, this function will get the accounts available in the extension to update local storage and sign from the polkadot-js extension.
  const transfer = async function main() {
    // Enable connection to the extension
    await web3Enable("my wallet");

    // Known account we want to use on Polkadot extension
    const allAccounts = await web3Accounts();

    // Get the first visible account of the polkadot extension.
    const account = allAccounts[0];

    // Store the public key in local storage.
    localStorage.setItem("Publickey", account.address);

    // Get the public key in local storage.
    const addressaccount: any = localStorage.getItem("Publickey");

    // Create an instance of the Polkadot JS API
    const api = await ApiPromise.create({ provider: wsProvider });

    // Create a transfer extrinsic
    const transferExtrinsic = api.tx.balances.transfer(
      valueAddress,
      Number(valueAmount) * 1000000000000
    );

    // Reset States
    setValueAmount("");
    setValueAddress("");

    // to be able to retrieve the signer interface from this account
    // we can use web3FromSource which will return an InjectedExtension type
    const injector = await web3FromSource(account.meta.source);

    // passing the injected account address as the first argument of signAndSend
    // will allow the api to retrieve the signer and the user will see the extension
    // popup asking to sign the balance transfer transaction
    transferExtrinsic
      .signAndSend(
        addressaccount,
        { signer: injector.signer },
        ({ status }) => {
          if (status.isInBlock) {
            console.log(
              `Completed at block hash #${status.asInBlock.toString()}`
            );
            setBlockhash(status.asInBlock.toString());
          } else {
            console.log(`Current status: ${status.type}`);

            setStatus(status.type);

            if (status.type === "Finalized") {
              toast({
                title: "Successful Transaction",
                duration: 3000,
                status: "success",
                isClosable: true,
              });

              ReactDOM.render(
                <ChakraProvider>
                  <App />
                </ChakraProvider>,
                document.getElementById("root")
              );

              onClose();
            }
          }
        }
      )
      .catch((error: any) => {
        console.log(":( transaction failed", error);
      });
  };
Great, now you have a component that has the ability to transfer a token to another address.
The transfer component when pressing the button would look like the following:
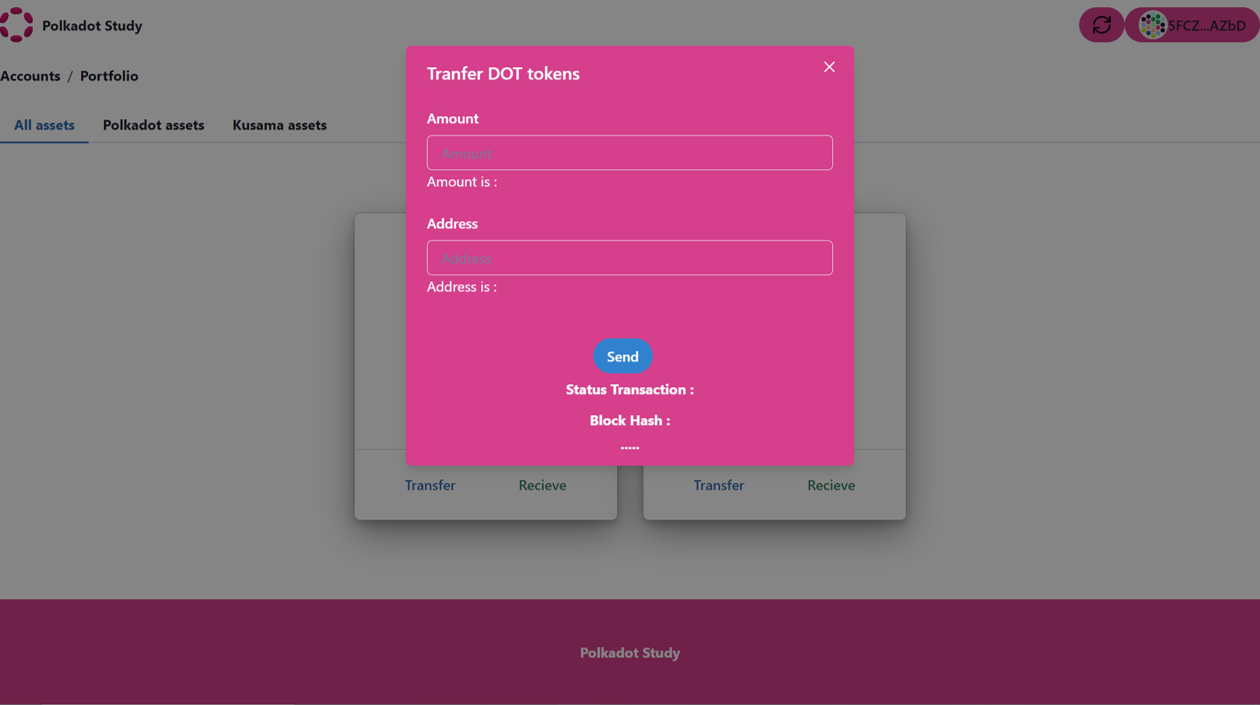
The final component would look like this:
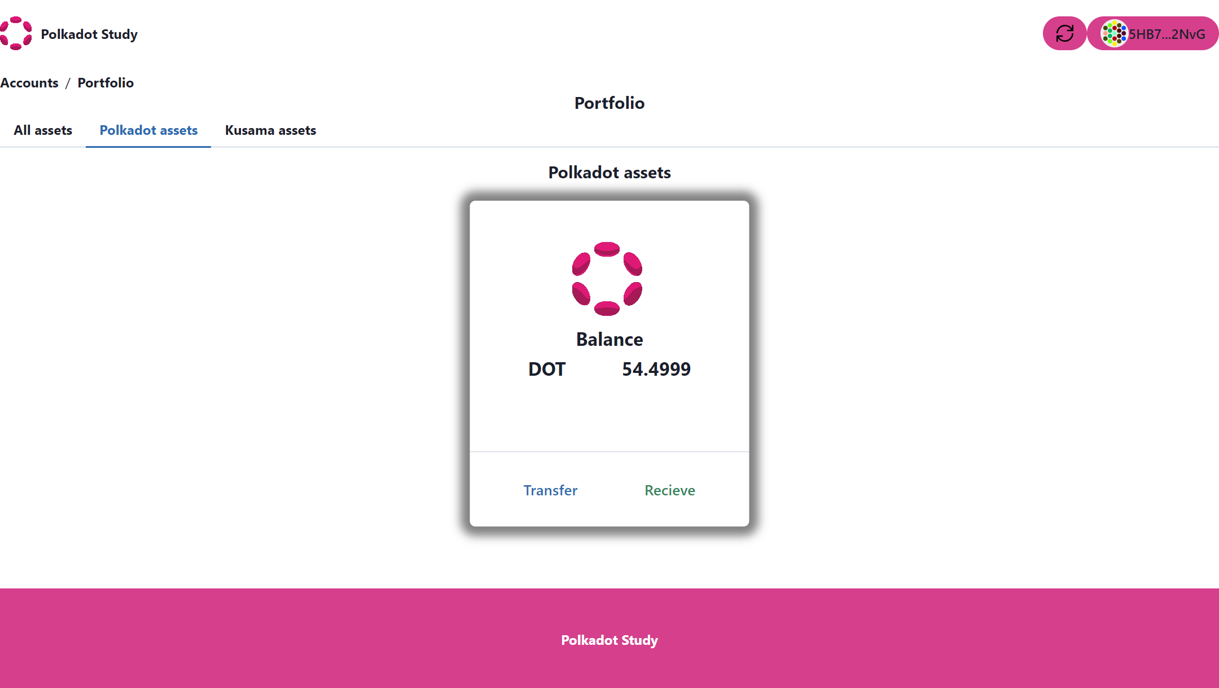
Great !!, now you have a graphic component that gets the balance of the public key stored in local storage and transfers tokens to another public address.
Note: If you have any questions about the final components, you can check out the FinalTutorial branch in the example repository.